Melanjutkan pembahasan artikel sebelumnya mengenai konfigurasi DNS Server di Linux CentOS, maka pada atikel kali ini kita akan membahas mengenai "Cara Konfigurasi Web Server LAMPP (Linux, Apache, Mysql, PHP & PhpMyAdmin) pada Linux CentOS". Sebelum masuk kebagian konfigurasi kita bahas dulu sedikit pengertian dari Web Server. Web server merupakan perangkat keras (hardware) atau perngkat lunak (software) yang meyediakan layanan akses kepada pengguna melalui protokol komunikasi HTTP atau HTTPS atas berkas-berkas yang terdapat pada suatu situs web dalam layanan ke pengguna dengan menggunakan aplikasi tertentu seperti web browser. Fungsi utama sebuah web server adalah untuk mentransfer berkas atas permintaan pengguna melalui protokol komunikasi yang telah ditentukan.
Untuk langkah-langkah konfigurasi LAMPP web server pada Linux CentOS adalah :Friday, July 11, 2014
Konfigurasi Web Server LAMPP pada Linux CentOS

Tuesday, July 8, 2014
Panduan Pembuatan SMS Gateway di Linux Ubuntu
Hardware Requirement
Spesifikasi Minimum : Processor : Intel P4 1.8GHZ
RAM : 256MB
Hardisk : 80GB
Modem atau handphone kompabilitynya bisa di cek di sini
RAM : 256MB
Hardisk : 80GB
Modem atau handphone kompabilitynya bisa di cek di sini
Software Requirement
Kebutuhan Paket Software :
- Linux Ubuntu
- Apache 2.x.x
- PHP 5.x.x (with mysql, session, hash, json extension)
- PHP-CLI
- MySQL 5.x.x
- Gammu
- Kalkun
panduan pembuatan sms gateway di linux ubuntu
Bila Anda merasa bingung atau belum mengetahui bagaimana cara install dan konfigurasi gammu di ubuntu. Kali ini kami akan membantu Anda dalam melakukan setting konfigurasi dan bagaimana cara install di Ubuntu. Untuk itu silahkan mengikuti langkah langkah dibawah ini. Sebagai contoh kali ini kami menggunakan ubuntu “Oneiric Ocelot” Ubuntu 11.10. Selanjutnya Langkah – langkah yang harus dijalankan untuk menginstall gammu adalah sebagai berikut :
Monday, July 7, 2014
Zoiper On Iphone
Phone Setup
- Acquire the following information by logging into my.vocalocity.com
- Extension Number
- Registrar
- SIP/Authorization ID
- SIP Password
For more details on how to gather the information above please visit the Extension Device Configuration article. - Search for and download the Zoiper App in the Apple App store.
- Once installed, open the app.
- Tap Settings.

Friday, June 6, 2014
Konfigurasi VPN PPTP pada Mikrotik
Virtual Private Network (VPN)
VPN dalah sebuah jaringan komputer dimana koneksi antar perangkatnya (node) memanfaatkan jaringan public sehingga yang diperlukan hanyalah koneksi internet di masing-masing site.
Ketika mengimplementasikan VPN, interkoneksi antar node akan memiliki jalur virtual khusus di atas jaringan public yang sifatnya independen. Metode ini biasanya digunakan untuk membuat komunikasi yang bersifat secure, seperti system ticketing online dengan database server terpusat.
VPN dalah sebuah jaringan komputer dimana koneksi antar perangkatnya (node) memanfaatkan jaringan public sehingga yang diperlukan hanyalah koneksi internet di masing-masing site.
Ketika mengimplementasikan VPN, interkoneksi antar node akan memiliki jalur virtual khusus di atas jaringan public yang sifatnya independen. Metode ini biasanya digunakan untuk membuat komunikasi yang bersifat secure, seperti system ticketing online dengan database server terpusat.
Wednesday, May 28, 2014
FreePBX: Inbound number not working help
Setting up an Inbound (DID/DDI) number in FreePBX can be tricky. We
have to do 2 things to get it to work. First we need to tell
FreePBX/Asterisk that the incoming call is allowed, the second is to say
what to do with that incoming call.
Lets look at allowing the call first. One of the easiest ways to do this is allow Anonymous SIP Calls in FreePBX. I recommend you do not do this though as you don’t really want Asterisk/FreePBX trying to process any call fired at it.
So if we’re not going to allow anonymous SIP calls we need to tell Asterisk what IPs to allow calls from, and we do this by setting up a trunk. When a call comes to our server we will receive a SIP INVITE from the remote server, asking us to accept the call, so let’s have a look at the SIP INVITE messages coming in …
Lets look at allowing the call first. One of the easiest ways to do this is allow Anonymous SIP Calls in FreePBX. I recommend you do not do this though as you don’t really want Asterisk/FreePBX trying to process any call fired at it.
So if we’re not going to allow anonymous SIP calls we need to tell Asterisk what IPs to allow calls from, and we do this by setting up a trunk. When a call comes to our server we will receive a SIP INVITE from the remote server, asking us to accept the call, so let’s have a look at the SIP INVITE messages coming in …
Monday, May 26, 2014
Installing FreePBX Official Distro

Follow these instructions for the Easiest, Totally Automated FreePBX install.
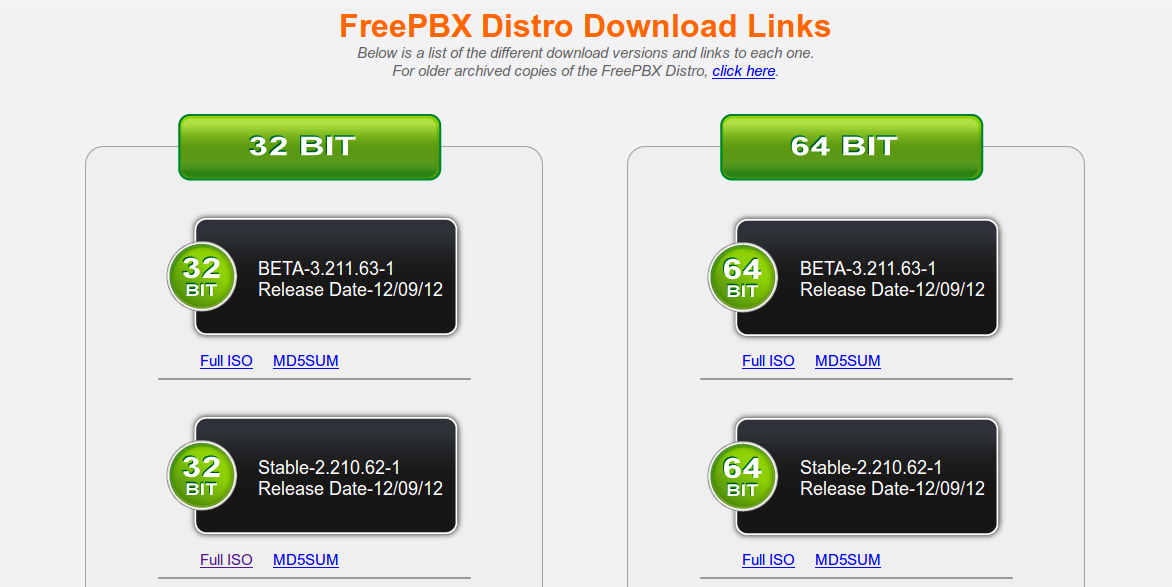
1. Download the ISO file from http://schmoozecom.com/distro-download.php.

Subscribe to:
Posts (Atom)

-
In this simple project, we’ll build a motion-sensing alarm using a PIR (passive infrared) sensor and an Arduino microcontroller. This is ...
-
Setting up an Inbound (DID/DDI) number in FreePBX can be tricky. We have to do 2 things to get it to work. First we need to tell FreePBX/A...
-
 Seperti yang sudah pernah saya utarakan pada tutorial sebelumnya dengan judul “ Konfigurasi RAID 0 di Ubuntu server ”. Partisi dengan te...

